Once again I am embarking on my Christmas Baking Project. What I do is make homemade cookies and cakes, pack them in decorative boxes and give them out to people. Always a better option than buying store bought gifts. It all started in 2009, Melbourne when I started seriously getting into baking. I wanted to present homemade treats to all my friends at work and otherwise. It was hard work and I did get frustrated along the way, even threw out whole batches of not-up-to-scratch cakes. I didn’t have a baking project last year because I spent Christmas back home with my parents, but it’s all happening again this year. So without much further ado, allow me to present my baking project 2011!! I’m back with more confidence and slightly more “in the know” about what works and what doesn’t.

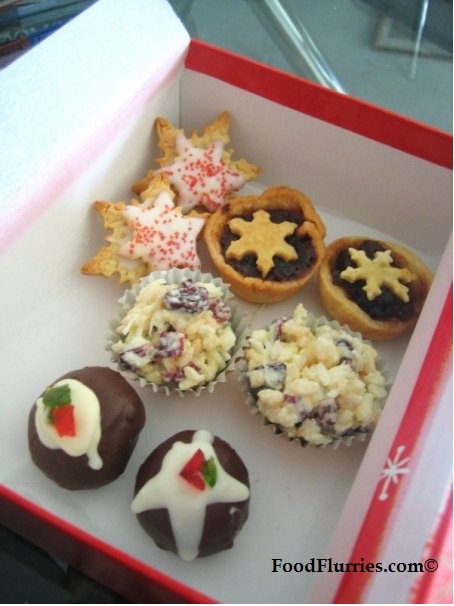
Christmas Baking Project 2009 ~ Mini Christmas Pudding Balls, White Chocolate Cranberry Crackles, Mini Mince Pie & Sugar Cookies.
The Plan :
The plan, as always, is to bake homemade treats and give them out as gifts to friends. This year will be extra special because now I am baking for all my new found friends here in the Netherlands. The project will be a 3 week long event and I will be posting updates each time I am finished with one item. I am also making a fair few things this year ~ different things for different people, so I had better get my organisation right.
The Office
These guys have been very supportive in my endeavour to start baking and have been very supportive of my blog. Appreciative of my creations and most generous with the compliments. So I plan to make them something special this Christmas as a THANK YOU. About 90% of the comments here on my blog come from the wonderful people at the office. Awww…! So here is what they’ll be getting :
- Christmas Log cake
- Meringue Tower
The Cafe Roezemoes.
Every week R and I have brunch at our favourite cafe before embarking on the weekly grocery shopping. These people are the warmest, and friendliest bunch I have ever met. It’s nice to have a regular place to have lunch at where the wait-staff know you, even the chef for that matter. I like them a lot and they have been serving us brunch every week for about 6 months now.
- A dozen Dark Chocolate Fudge Cupcakes
The Neighbours.
The neighbourhod project is more a business plan than anything else. I intend on introducing my baked goods to the neighbours by giving them a sample box with my business card in it. Well less of a business card, more of a “Merry Christmas!! Here are some treats. If you want more my number is on the back” kinda thing. Playing it subtle here. Anyway, it gives me the opportunity to try out some fancy things in the kitchen I won’t normally whip up.
- Chocolate Cranberry Cake
- Chocolate Rhum Balls
- Iced Gingerbread Biscuits / Sugar Cookies
So with every project comes the preparation. Considering my more slightly ambitious list of tasks I wish to accomplish, the preparation list was never going to be simple. Well in my defence it is because I moved to the Netherlands with practically nothing but my suitcases. All my baking things I gave away to friends. So I am literally starting all over again from scratch ~ but I am not complaining, no siree.
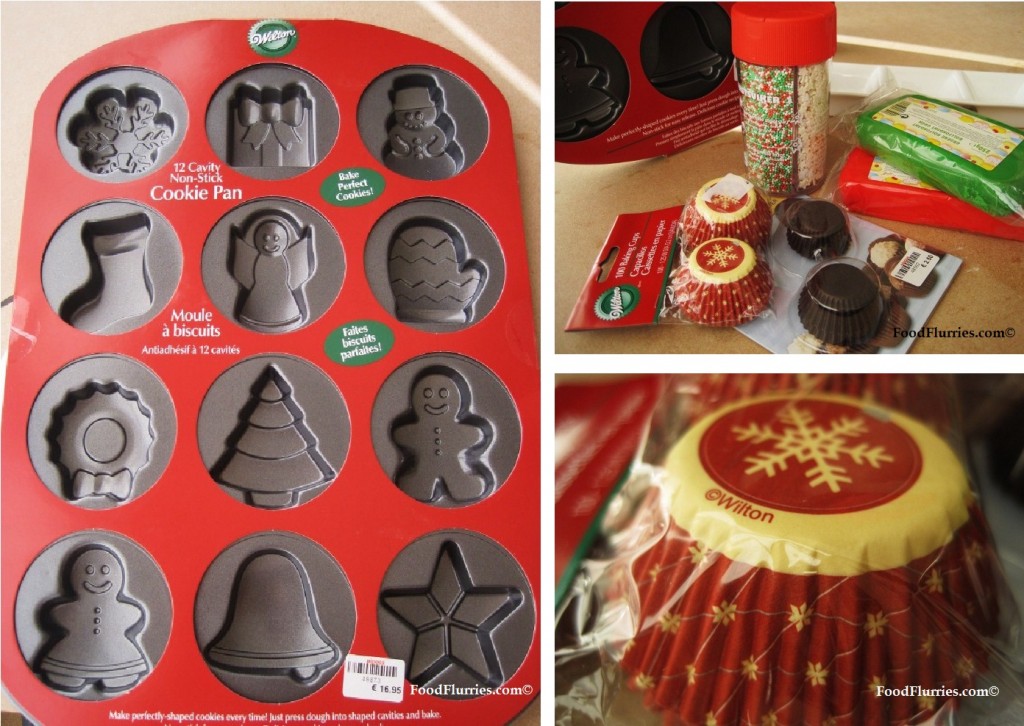
Went to my favourite baking store to pick up supplies. Now, HOW COOL is my new cookie tray, huh! R found it for me, bless him. I was busy picking out papercups and piping nozzles. He found it under a pile of other baking trays, and it was the last one. Yay me! Wasn’t exactly cheap but it’s good quality. I initially went into the store to pick up a #2 piping nozzle, cupcake cases and a styrofoam cone for my meringue tower. But once R showed me the tray I could not put it down. I mean how could I??? So excited. I wanna bake my cookies today, and ice them with colourful royal icing. Bring on Christmas!!
Two blocks of coloured fondant made it into my basket (I can never walk into a store with a list coz I never stick to it anyway) and I also picked up a tumbler of Christmas sprinkles for € 2 … make that TWO tumblers actually. Awesome! Xenos rocks, I believe I have mentioned this before. They bring in new things every season and it’s a real treasure trove. One container, six different sprinkles. I have a thing for cake decorations, so I really went for it. I also picked up Christmas cookie cutters. Yes, I went a bit overboard on the weekend. Almost picked up a turn table for icing cakes. *gulp* I have no self control!! Now all that’s needed is a circular cake board for the meringue tower to sit on, and a 12 hole cupcake box.
First on my list of things to make will be the
Chocolate Rhum Balls.
I figured since rhum balls are the easiest to make I’d start here. I used a Chef John Mitzewich recipe. I don’t really think rhum balls require a recipe, coz they are practically impossible to mess up. Four ingredients is all you need : Chocolate, cream, liquor of choice and sprinkles. Chef John’s version were peppermint flavoured balls, but I’m pretty positive swapping with rum ain’t going to spoil it. You might want to up the alcohol content if you find 2 tsps aren’t enough. If using pure peppermint extract or liquor then 2 tsps is plenty. Other liquors you can use include, but not limited to Cointreau, Brandy, Whisky, Baileys, Khalua, Raspberry vodka.
Place these onto confectioners paper cups or place in a pretty jar, tie a ribbon and attach a greeting card. Homemade gifts are fun to make and just think about the joy people will feel upon receiving these.
Christmas Cupcake Covers.
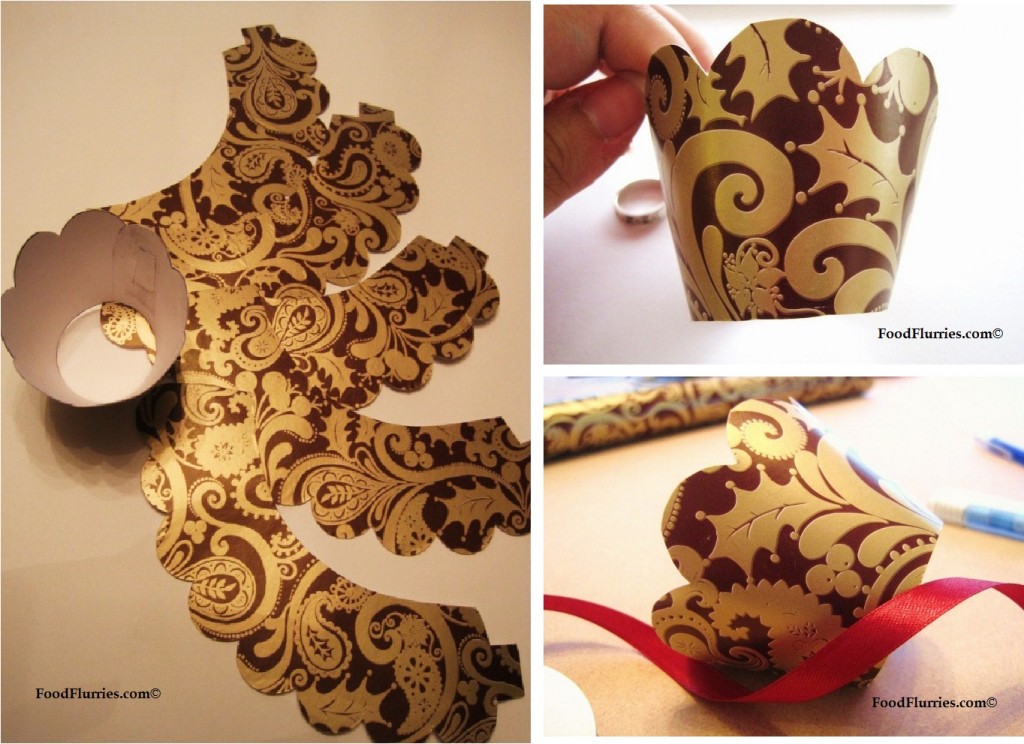
Making cupcakes for the staff of Roezemoes cafe. We go here every weekend for brunch. For all their fantstic service and good food every week, I am going to present them with a box of my homemade Dark Chocolate Fudge Christmas cupcakes. I want them to look as nice and as elegant as possible ~ presentation is everything. But I also don’t want to blow the budget, soooooooo, I made my own cupcake covers. I mean it’s one thing to spend money buying fancy cupcake paper cases, but don’t you just hate it when they don’t keep their vibrant colours and patterns once they are baked and they stick to the cake? Almost seems like it’s not worth it. Might as well bake in white paper and then put those into the fancy papers. Or you can put them in stiff cupcake covers. Most stores will sell you about 12 covers in a packet, however the patterns are limited. I can never find a pattern that makes me go “YEAH! BINGO!!” So I made my own. Problem solved.
With two sheets of stiff card, some adhesive spray and inexpensive wrapping paper, all totalling aboout € 5, I could get over 24 cupcake covers in the pattern that I want. Not exactly fancy laser cut covers, but I think my handiwork turned out pretty well. They suit the theme I was going for anyway. The choices are endless. You can dress them up as fancy as you want or keep them plain and simple. I find that simple home projects like these really help keep me occupied as I now live at home full-time since quitting my job to move here to Amsterdam.
To make paper cupcake covers of your own you will need :
- Spray adhesive
- Sheet of sturdy weight card (100 x 80 cm)
- Wrapping paper of your choice
- Pair of scissors
- Craft knife
- Pencil
- Template – I just got mine off the internet
1. Trace the shape of the cupcake cover onto the stiff card by drawing around it with a pencil. Roughly cut around the template about 1 cm away from the drawn borders.
2. Using the spray adhesive stick the wrapping paper (that has been cut to size) on the back of the template … pencil side facing down.
3. Now flip the template over again and begin cutting around the edges according to the pattern you have drawn.
4. You now have flat sheets of cover. Bend the card round and secure the edges using some sticky tape or by using an interlocking tab. Voila!
5. You may choose to stop here or carry on with embelishing further by placing ribbons and stickers on your cupcake covers.
Making a Meringue Tower.
I have always been fascintaed by these towering confections on display in the windows of fancy bakeries ~ delicately placed white meringue kisses shaped like a Christmas tree. Sometimes its a delectable arrangement of cream puffs drizzled with chocolate sauce and a generous dusting of powdered sugar. Absolute heaven.
Everytime I see towering towers of goodies like these, images of Brunetti’s cafe in Melbourne come to mind. They sold the most wonderful Italian creations ever, and I used to stroll down there just to look at their cakes. Masterpieces every one of them. The one that struck me the most was their ‘croquembouche’ ~ which is where I got my idea from ~ only difference is I am using meringue kisses rather than cream puffs.
You will need :
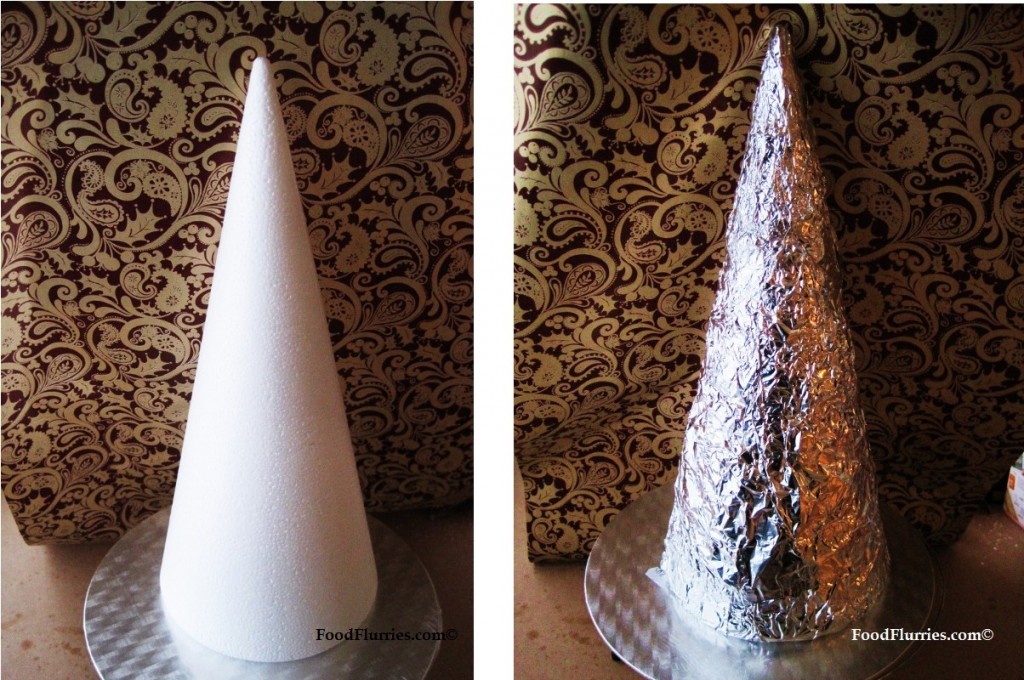
- 1 cardboard or styrofoam cone
- 1 solid cake board, about 1 inch wider than the base of the cone
- Cling film, baking paper or tin foil
- About 60 meringue kisses (depending on how tall you are making your tower)
- A batch of royal icing
- Silver cachous
- Ribbon to decorate
1. Place cake board firmly on a flat work surface.
2. Wrap the cone in baking paper or tin foil. Then stick the cone to the cake board by applying a smear of royal icing to it’s base.
3. Now work your way up the cone with your meringue kisses starting at the base. Apply some royal icing to the flat side of each meringue and stick them to the cone one by one. The royal icing will act like an adhesive agent, sticking your meringues to the cone as it dries. Be patient and don’t rush the process. Meringues are delicate and may crack if handled roughly. If you do not want to use royal icing then sticking the kisses on with melted chocolate is just as yummy.
4. Once you get to the top, place your final meringue kiss and then leave the tower aside to dry completely before you go medling about trying to decorate it with ribbons and bows.
5. After about an hour or so, you may now proceed to add all the other fancy embellishments your heart desires. Silver cachous glued to the points of each meringue kiss is a good start. then add your ribbon, and you are all done and ready to impress. Trust me, this creation really gets the attention of people.
The recipe for royal icing will be given in a separate article. Before you begin however it is worth noting that it take a freakishly long time to bake the meringues …. about 2 – 3 hrs. Why? Because you want them to be as dry as possible but you do not want any colour on them. You want to aim for bright white meringues that are crispy and airy. So the secret is low heat + long baking times.
Hope you guys give this a try and maybe even send me some of your pictures and I’ll post them up on the site. 🙂


1 ping
Dark Chocolate Fudge Christmas Cupcake » Food Flurries
December 3, 2011 at 6:57 pm (UTC 1) Link to this comment
[…] cupcake recipe is part of my Christmas Baking Project 2011. Every year I whip up a batch of cakes and cookies and make up Christmas hampers to give out to […]